Site sections
Editor's Choice:
- Bedroom design options in blue for a couple
- How to paint wallpaper for painting: tips and tricks
- Kitchen design in Khrushchev: useful tips for those who have a small kitchen
- How to punish noisy neighbors from above
- Design of a nursery for children of different sexes
- Shower cabin in the interior of a small bathroom
- Which light is better - warm or cold
- How to care for recently pierced ears
- What to do if the neighbors above are constantly poured
- Materials used for suspended kitchen ceilings
Advertising
| How can I make a set for the corner kitchen? How to make a corner cabinet in the kitchen with your own hands |
|
We continue to collect furniture, I hope, this time we will finish and get the final result Cutting table topsAfter marking the countertops the question arose how to cut them in size? If you yourself get an electric jigsaw uneven, and manually must probably be a week to cut. Started looking for where they sawed? At a sawmill, perhaps, or a carpentry workshop or a furniture factory? In short, we understand and did not have where to go with these tops. After a long search, it turned out that furniture companies refuse to cut wood tops. But we found a cut that agreed. They had a cool CNC machine, which in a matter of seconds with surgical precision, we drank both tabletops and for only 200 rubles. Selection and installation of car washWe started the selection in the article about laying the floor. So after a lot of agony of choice, we chose the more practical and reliable artificial stone Grand Fest and not the beautiful snow-white ceramics Dumse. After cutting to size, it was necessary to cut openings for a new sink and hob. And just then everything can be done by the electric jigsaw, as ideal evenness is not needed, the edges will disappear anyway. I just put the sink on top, traced a pencil from the drawn perimeter, sifted 1.5 - 2 cm inside and drew another smaller perimeter. Then he drilled holes in the corners so that the saw from the jigsaw interposed into these holes, well, and began to cut a hole. Cut out the hole for washing From under the jigsaw flies a lot of sawdust and they all fall into the nose of the eyes of the mouth and it is unbearable. A long time ago, I was fascinated by Airsoft, since then I have some equipment left, which I used to protect my face from flying sawdust. A wooden array is sawn very hard, even working with a jigsaw, you need to apply force. Yes, and the sawing very quickly dull, it went somewhere 4-5 pieces.
Sink Hole Ready It turned out that the sink got in, and the cabinet under the tabletop should also be slightly trimmed.
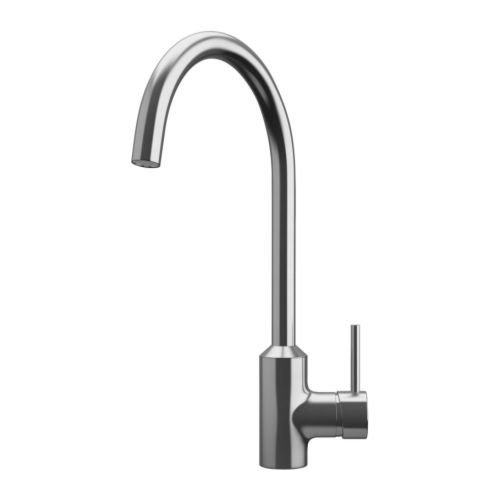
Everything, the wash stands still Selection and installation of the mixerBefore this post, we had the simplest Ikeevsky mixer, we got it along with the kitchen. According to him it was clear that he had seen quite a few in his long life, but with no hint of undermining or leakage. I got the impression that Ikeevsky mixers, though expensive but very reliable. Julia: i looked on the Internet for more versions of mixers and found branded German for the same money. Yes, indeed, mixers such as the German company Grohe costs about the same as a mixer from Ikea. 4500rub
Initially they wanted this - Grohe But it turned out that from German they only have the name of everything else Chinese, and Ikeevsky is bigger in size, which I just wanted. We bought a mixer Ringsher mat for 4800rub.
But they chose this - Ikea Ringsher There were short wires in the set with the mixer, I thought that I would install the old mixer, oh hell ... The new mixer has some non-standard ones, the holes for the hoses are a little smaller. Fucking Ikea with their European standards. Googling found a solution with an adapter, but in the nearest store of this adapter was not, the seller suggested connecting the hoses and standard hoses using a coupling. And he did. Plus another 250 rubles.
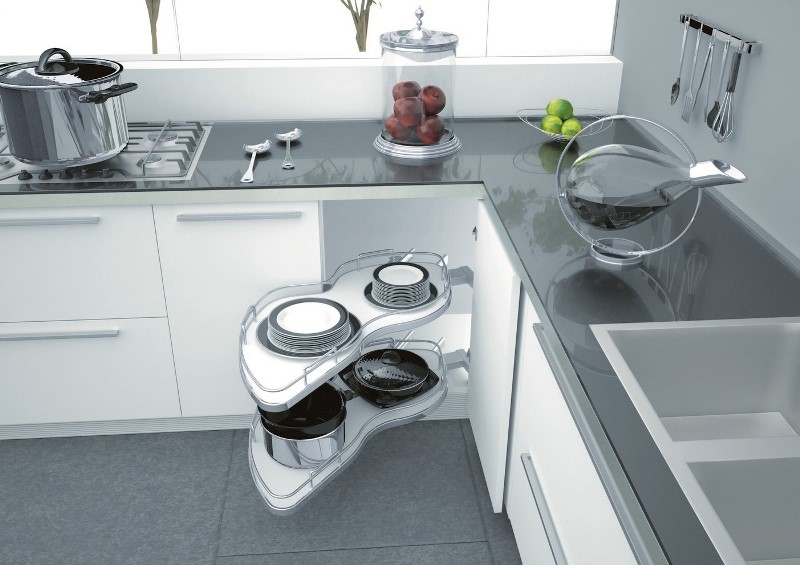
Connection to sewage and plumbing It is quite difficult to make a corner cabinet in the kitchen on your own, but the result will meet all expectations. Creating furniture for kitchens of non-standard dimensions depends on the layout of the room. Stores do not always offer corner cabinets for dishes that save space in a small kitchen. It is quite difficult to make a corner cabinet in the kitchen on your own, but the result will meet all expectations. Sometimes you may need only a floor cabinet, but the conditions of a small-sized kitchen do not allow to put it indoors. It will be cheaper to make it yourself than to spend money on custom-made furniture of non-standard sizes. Having thought up the design at the beginning, you should proceed to the development of the drawing with an indication of all dimensions. Purchase of necessary materials is made on the basis of the calculations made. On sale for the creation of pieces of furniture is always available chipboard and MDF. These types of materials are in great demand. Specialists who trade in them can immediately process the edges of the blanks after the cutting. If you pre-order the drilling of holes, then this will connect the parts with the help of dowels. You can make not only small floor cabinets, but also sets of furniture. They are necessary for the storage of utensils, dishes, household kitchen appliances, products. Before creating such a project, a kitchen plan is drawn up, where the location of the stove, sink, pipes, hoods, etc. is noted. Hanging cupboards allow you to disguise the gas meter and wiring. Inside them are provided shelves where the dishes should be stored.
It is important that the corner cupboard can stand close between adjacent pieces of furniture. The curvature of corners and walls leads to the fact that adjacent cabinets have walls that are 1 cm or more apart from each other, and that gap disappears in another. This leads to a shortage of space for new furniture. If you make the corner structure yourself, you can always make it smaller. How to make a kitchen corner cabinet (video)Materials for self-creating furnitureA fully equipped kitchen should have a uniform design. If the kitchen has furniture items that are outdated in appearance, you can replace their facades. This will require the purchase of new materials. For this purpose, suitable and decoupage technique. Decorate in this style can furniture made from the same types of materials. The choice of material can be started after determining the place where the cabinet for the kitchen will be located. It can be angular or wall, which is determined in advance. Measurements are preliminarily made, and then sawing is ordered. 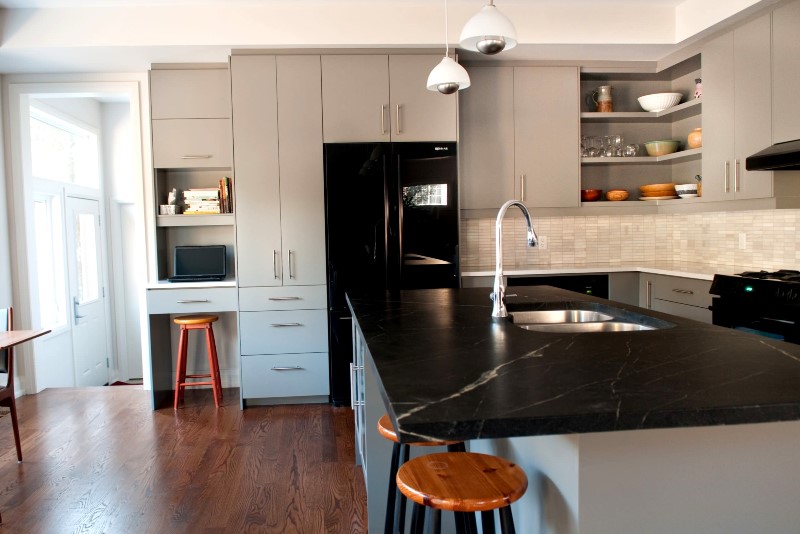 You can make not only small floor cabinets, but also furniture sets You can make not only small floor cabinets, but also furniture sets The material used for the manufacture of kitchen furniture, must meet the following requirements:
The ideal is laminated chipboard with increased moisture resistance and density. The size of the thickness of this material can be 16-18 mm. From above it is covered with a layer of artificial veneer. To make a cabinet for the kitchen, you can use the following types of materials:
In order to save materials, it will be necessary to plan the manufacture of small pieces of furniture. For example, a narrow cupboard will not take up much space in the kitchen.
The kitchen, furnished with multiplex furniture, is resistant to mechanical stress. This material is considered to be moisture resistant, it is made of thick veneer. Polyurethane varnish is used to cover the surface. If you make curved panels to order, you can make an angular sideboard with a radius facade of this material.
Solid wood is the most expensive material that needs special impregnation, as well as treatment with protective varnish. From this canvas you can make an elite sideboard in the kitchen, combining it with other types of materials. For example, it can be a framework for facades. Corner kitchen do it yourself (video)Preparing to construct a modelThe kitchen is a place for cooking, therefore safety requirements must be observed in this room: the distance between the cabinets and the sink, table or stove must be made acceptable. Corner cabinet design includes left and right sidewalls, symmetrical to each other. The dimensions of the roof and bottom are usually completely identical. Some models may provide a backdrop. The height of the kitchen cabinet is usually related to the height of the table, stove or sink. If the kitchen has a high ceiling, then you can make a cabinet with your own hands. The table top, which is a cabinet cover, should protrude beyond the facade. The depth of the inner shelves is less than the lid and bottom, as otherwise the door of the product will not close. Wall cabinets sometimes reach to the ceiling, especially in small kitchens.  The kitchen, furnished with multiplex furniture, is resistant to mechanical stress. The kitchen, furnished with multiplex furniture, is resistant to mechanical stress. In addition to basic materials, you will need auxiliary elements:
From the tools you will need:
After cutting the material, you can proceed to assembly. It is carried out in the following sequence:
You can make your wardrobe, making a preliminary assembly using wooden dowels. If the product is assembled correctly, does not have any distortions, then the dowels can be smeared with glue for further fastening. After fixing the backdrop with a stapler, you can proceed to the installation of accessories. Talk about secrets ...Have you ever had joint pain? And you know firsthand what it is:
Please answer the question: does this suit you? Is it possible to endure such pain? How much money have you already “leaked” to an ineffective treatment? It's time to end with this! Do you agree? Today we publish an exclusive interview with Professor Dikul, in which the doctor revealed the secrets of getting rid of joint pain, treatment of arthritis and arthrosis. Attention, only TODAY!
Despite the richest selection of furniture for kitchens in furniture stores, sometimes you have to face a problem in the form of a non-standard room in which the finished furniture cannot be placed as the host would like. Many are not satisfied with the rather high prices of kitchens. There is only one way out in such cases - to make the kitchen yourself. Developing a future kitchen projectFirst of all, they make measurements of the premises taking into account all communications, window and door openings and walls between them. Then choose the desired type of furniture placement: linear, corner or U-shaped. Usually in the kitchen there are several main areas:
Countertop for the corner kitchen with stove consists of several parts: A wing along one of the walls should include a slab between the pedestals. In any case, this part of the tabletop is divided into 2 pieces, the dimensions of which are dictated by the size of the room, the dimensions of the plate and its location. Another wing is made solid, its dimensions are calculated based on the total length of the wall minus the width of the 1st wing and a small gap (1-2 cm) between the edge of the tabletop and the door jamb, if it is located here. The height of the table top is calculated based on the size of the facades chosen for the manufacture of the kitchen. They are most often standard, and if they have a pattern, frames or panels, they will not be able to change their size. Therefore, before drawing up a project, it is best to familiarize yourself with the range of facades offered by the outlets. When drafting a project, it is necessary to take into account the placement of the illumination of work areas. Back to table of contents What materials and tools need to prepare?According to the draft and calculations made on its basis, you will need to purchase:
Sawing chipboard is best ordered upon purchase, but you can do it yourself. In this case, you need to additionally purchase an edge for laminated chipboard and, after cutting the parts, glue it with a hot iron to all the cut points opened in the finished product.
For ease of operation and accuracy when drilling holes for fasteners, you need to make a template of 2 flat planks or rulers, fastened in the shape of a T. The angle between them should be carefully aligned to make it exactly 90 °. On the "leg" of the letter T put marks 8 mm, 16 mm, 32 mm, 50 mm, 70 mm and 100 mm. The distances lay from the edge of the “upper crossbar” of the structure. The 8 mm mark will help to drill the holes exactly in the center of the end of the particle board, from which the thumbs will be collected. The rest can be used to accurately mark the distances between the holes, between the edge of the bollard and the hinge mounting hole, etc. Back to table of contents Making furniture for the kitchenMost often in small kitchen premises of modern city apartments furniture is installed, which occupies 2 adjacent walls and the angle between them. Corner kitchen allows you to get the maximum area of work surfaces and storage space for kitchen utensils. At the same time there is a lot of free space for the installation of a table and several chairs to eat in the same room. If desired, and the ability to make a kitchen of a different configuration, it is only necessary to double the number of thumbs and make the 2nd corner for U-shaped furniture placement or limit part of the headset parts for a linear shape. Back to table of contents Assembly of curbstone modules of the angular headset
|


| Read: |
|---|
Popular:
How to fix a grip profile to a wall
|
New
- The interior of the room with wallpaper in flowers
- Piercing - “8 earrings, a lot of photos, how to care, how many heal, where to do, how to accelerate healing, what would I bring back?
- Window opening in a brick wall
- Finishing the bathroom with plastic panels
- Long narrow kitchen - layout (41 photos) of comfortable space
- White apron on the white kitchen - a classic combination
- Selection, consumption and features of applying paint on the wallpaper
- Designing a wardrobe - six simple steps
- Rating of the best oil heaters by user reviews
- What ear pierce guys normal orientation


