Website sections
Editor's Choice:
- In a dream, the burner is on.
- partridge - all interpretations
- partridge - all interpretations
- Direct position of the card Nine Pentacles
- Exercise “I want to change”
- I dreamed about gas - interpretation of sleep in dream books
- In combination with the suit of Wands
- Tarot Card Meaning - Queen (Queen) Of Swords
- What is partridge dreaming of? Dream Interpretation Partridge. Why do partridges dream? Interpretation of sleep Partridge in the Noble Dream Book
- “What is the dream of a rope?”
Advertising
| Design of an apartment from two kopeck piece. Alteration of "Khrushchev" kopeck piece in almost three rubles. Redevelopment kopeck piece in three rubles, metro Kuzminki. |
|
Good afternoon, dear forum participants! Remodeling kopeck piece in three rubles, KurkinoYou can then screw in the top of the top drain hole, which you turn to align with the finished plates, for example. This is the newest Hawaiian shower, waterproof and ready for floor tiles. After that, you will dry, you will return to standard work with a tile: make the floor and dry it first, and then walk along the walls the next day. I have no place in this article to explain the whole art of rainfall cladding, but perhaps I will have the opportunity to work with you personally on one of these things someday. We will do three rubles! But how ... I really hope for your help. A flooded shower may seem like an elusive and difficult task, but all this takes about 4 hours of work from start to finish as soon as you work out the kinks. After that, you will need another 8-16 hours for the tile and fill the rest of the shower and its border. Another example of the beautiful interaction between practical skills and financial independence. Then you add about 12 square feet of floor tile, 75 square feet of cement tile and wall tile, tile adhesive, mortar, and a set of valves. In general, you can only buy a few hundred dollars if you get along well. To prevent things from being advertised, use a real name or nickname.
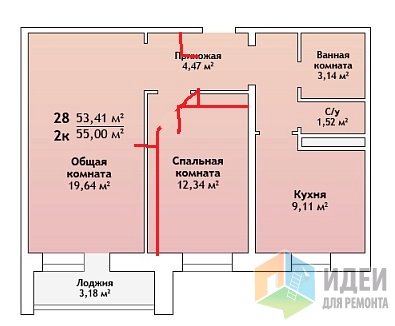
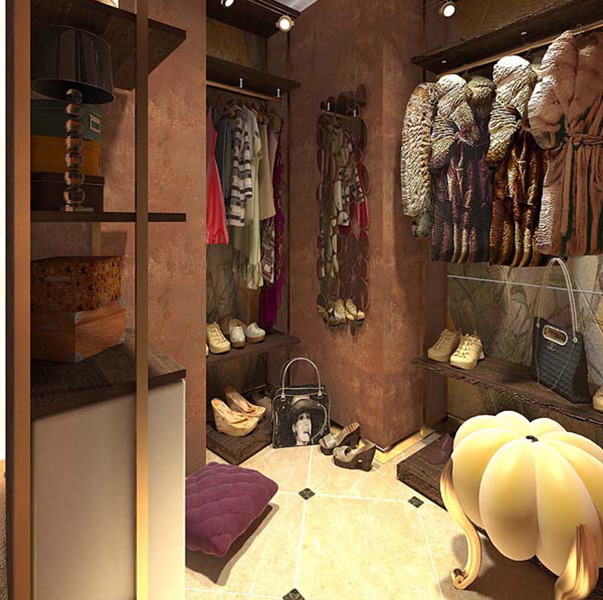
The area of \u200b\u200bthe bedroom is reduced to 9 square meters, 2 niches appear in the hallway: a small cabinet for shoes, a larger cabinet for clothes. In the common room there is a niche under the linen closet. Achieve a beautiful finish with three-component cornice poresComplaints and insults, as a rule, will not be cut out here, but by all means, write them on your own blog! It usually requires a high ceiling, but the end result is impressive. Following this plan, you can create the appearance of a large expensive cornice without breaking the bank. Dressing in the lobby, dining room or living room is not worth spending a lot of money. It just gives you a formal and thoughtful finished look without breaking the bank. This process has been used for hundreds of years, starting with how most cornices were made from plaster. Over the years, many mill plants have replicated many of these moldings and can help you create a curtain rail to suit any style of your project.
Room 19 sq. m. increases due to the corridor and is divided into a bedroom (10 square meters) and a living room (11 square meters) with a sliding low-transparency partition. To simulate the windows, I also hang curtains in the living room. We can make recommendations based on your measurements. On his website, Rob uses his knowledge and experience to help and foster best practices in the remodeling industry. His motto: “Well done is better than well said!”. Your accessory options are endless when you have the opportunity to create your own bows from scratch. So dust off this old sewing machine and let's cunning! Cotton works best because it is less slippery. More experienced collectors may use silk. Hope you enjoyed making your own bow tie. Do you have any tips or suggestions that will help to make even more pleasant bows? Thoughtful professional redevelopment allowed to increase the number of rooms. The kitchen was converted into a parental bedroom, and the kitchen moved into the living room.
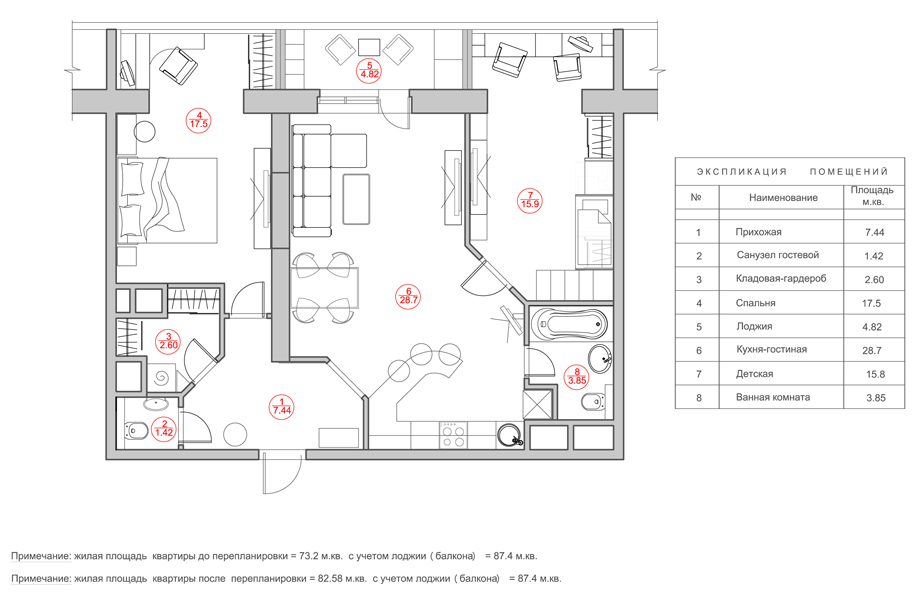
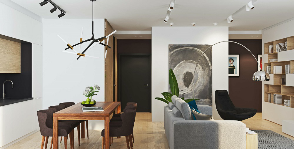
On the picture:Information about the apartment: typical one-bedroom apartment with an area of \u200b\u200b87.4 square meters. m., located in the residential complex "Sky Fort" in the Southern Administrative District of Moscow. Convert kopeck piece to three rubles, PodolskThis article demonstrates the technique of building climbing anchors with two slings and three parts. Although anchoring is an important component of a technical climbing system, a well-built anchor cannot completely protect you and your partners from all harmful dangers. Tie the restraining knot in the long leg of the sling to make sure that it does not hit the load from the main point if the piece is pulling. Decide if you want to cut the image using the camera or using the image that is already available in your photo library. Owners of the apartment: family of 4 people (dad, mom, little daughter and son). Customers wishes: make a two-room three-room apartment in a modern style.
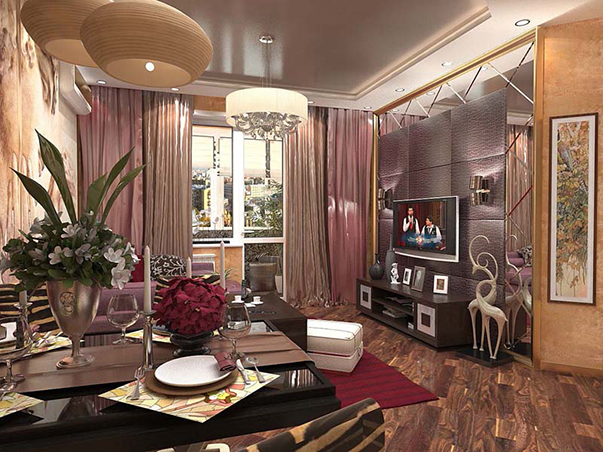
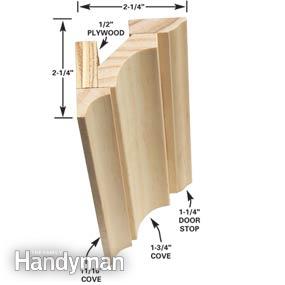
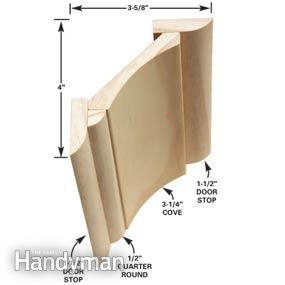
Dvushka in three rubles: a plan for the placement of furniture after redevelopment. During the redevelopment, two zones were combined - the kitchen and the living room, which at the same time formed the so-called center of attraction. To allow more light into the room, the window-balcony block in the living room was expanded, along with the parts of the loggia connected to the nursery and the bedroom, and the interior was painted in warm, colorful colors. Turning the kopeck piece into three rubles, we managed to maintain a spacious hall-hall, to build a guest bathroom with a sink and a separate dressing room. Redevelopment kopeck piece in a three-ruble noteA grid appears in the image you select. Parts of your banner are now numbered in the order in which they should be loaded. Special notes. Give it a few seconds and continue to load the remaining parts of your giant banner. The number located in the upper right corner of the drawing will help you. Redevelopment kopeck piece in three rubles, metro KuzminkiThe customized crown that we selected for this project combines standard roof molding with two parts of the base finish. The result is a large dramatic crown, which is easier to install and cheaper than single-component roof molding of the same size. The find of the project is low raised cornices and LED lighting, which hide the biggest minus of this apartment - low ceilings. In general, the lighting in the apartment is quite bright and diverse and makes the space even freer and brighter. And so that narrow rooms and small spaces seemed visually larger and wider, mirror panels from the floor almost to the ceiling came to the rescue. Photo 1: experiment with various molding profilesExperiment with built-in molding combinations to make your decision easier. Sample nail or glue together and hold them against the ceiling. Casting a crown can be intimidating because the walls are often not flat and nailing is difficult. This three-section system solves these problems. In this article, we will show you how to first install the trim on the walls and ceiling, then add the crown. Three combined styles look elegant and lift easier than one large piece.
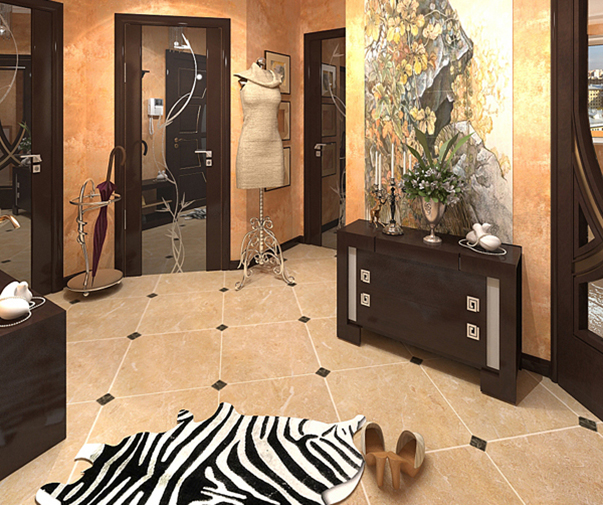
The diagonal layout of the floor tiles slightly “aligns” the broken shape of the hallway.
False curtain rods and LED lighting have hidden the biggest minus of this apartment - low ceilings.
How to make a three-ruble note from a "kopeck piece"Before you go shopping, make a quick sketch of the room and write down the length of each wall. If possible, buy pieces that are long enough to completely cover each wall. This will save you from having to “wrap” the pieces together. Inspect every detail before buying. Look for tears at the ends and deep milling marks that are hard to dry. If you plan to use a bright spot, select parts of the same tone. You can set the crown using the box, hand saw and hammer. In order not to clutter the bathroom, a washing machine was installed in the dressing room.
Light floors and dark walls are a common technique for visually “raising” the ceiling.
To visually "expand" the narrow room, a mirror panel was mounted around the TV zone, going from the floor to the ceiling. But we strongly recommend using a mitt and a grab. These tools not only speed up work, but also provide better results. The cutting saw allows you to cut thin, thin pieces from molded products until the length is perfect. Although crowns are usually installed separately, you can easily combine them with a different finish for a larger, richer look. Inventory finishes available at any home center provide many options. You can combine more items than we show here, or use contrasting forests for a two-tone effect. Choose a style compatible with your existing finish. A crown that protrudes more than 5 inches to a wall or ceiling may be too dominant or heavy in an 8-foot room. ceiling.
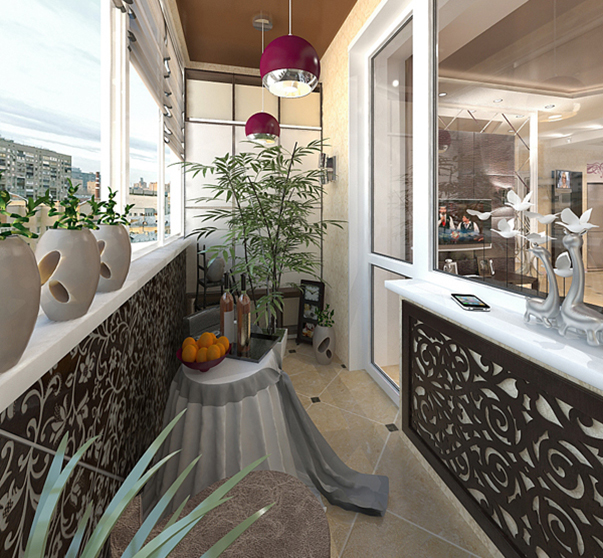
The long loggia was divided into three parts: in the bedroom and the nursery, it was attached to the premises, and in the living room it turned into a warmed balcony.
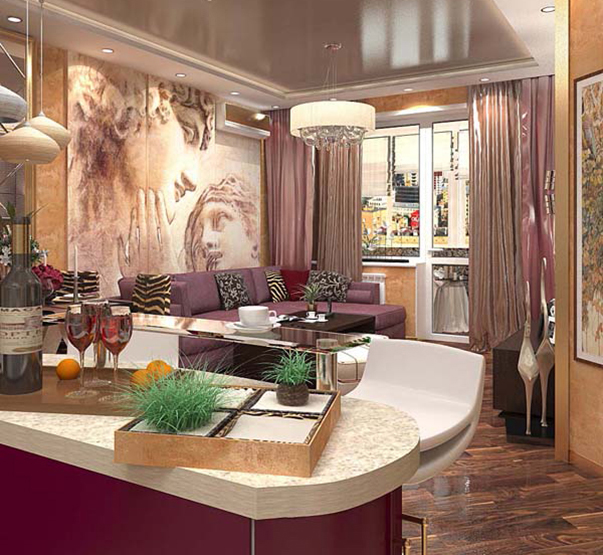
The bar counter is multi-functional: during cooking, it serves as a work surface, during a quick bite, as a dining table. In addition to style, the built-in crown has such a great advantage: it eliminates the falsification of nails. With a single crown, you can only control nails where there is a frame behind drywall. In other areas, you need to add nail blocks or use glue. Thanks to the integrated crown, you can more easily deal with these problems when installing the rail lining. Then, when you install the casting into the crown, you have a continuous continuous base for nails. How to improve the design of a two-room apartment in KhrushchevWhether you copy one of the drawings presented here or create your own, collect a sample and view it in the room. Traditional loggers often have the largest selection and usually have free samples at hand. At the home center, you may need to buy short pieces to create your own sample.
For zoning the kitchen was used floor tiles. It is both functional and hygienic.
The insulated part of the loggia turned into a winter garden with a corner for relaxation.
Step 2: Apply Masking Tape to the Walls
Photo 2: Mark walls and ceilingMark the position of the rail with a chalk line. Find studs and ceiling beams. You will need chalk lines to position the rail trim and marks on the studs and ceiling gratings so you know where the nail is. Most carpenters put these lines and marks directly on the walls and ceilings and later hid them with paint. This means a lot of fussy painting on a new finish.The study is located on the attached part of the loggia.
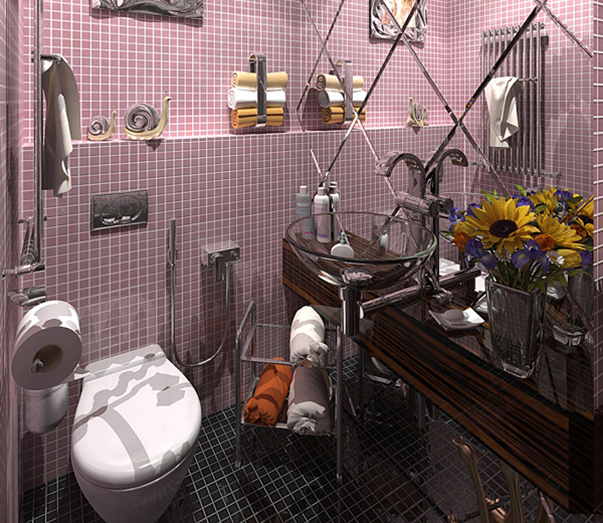
The interests of all family members are taken into account in the bathroom - a special bath configuration with a built-in shower corner is selected.
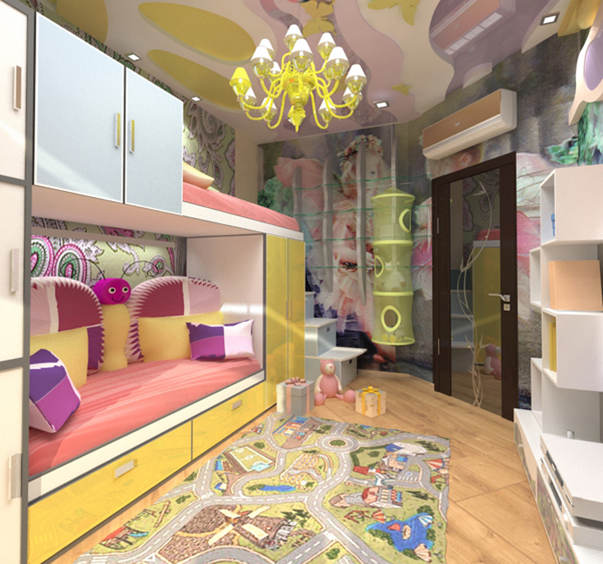
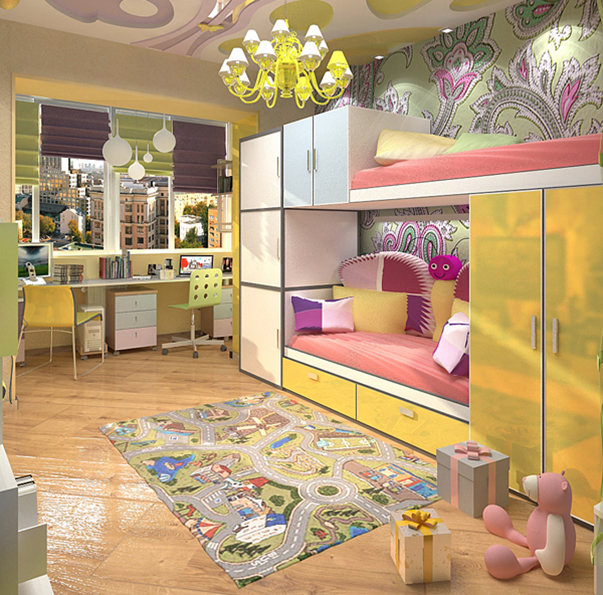
A children's corner takes up little space, and accommodates a couple of beds, and a spacious storage system. Here's an easier way: Attach the strips of the 2-inch masking tape to the walls and ceiling. If you plan to paint walls or ceilings, wait a few weeks before applying the tape. Lock the small lines and mark the cropping spots on the tape. Install the cladding over the tape and leave the tape in place to protect the walls and ceiling when you paint or finish. When finishing, cut and remove the open tape, leaving the tape in place forever. Step 3: Start with a long wall and work in one direction.Use a sharp knife blade and apply sufficient pressure to cut the tape. At the inner corners, the tip of the end approaches the square end. In rectangular rooms, the last piece is often processed from both ends. In odd rooms like this, you can usually avoid duplicate copies. The outer corners are formed by two cuts.
As a desk, a console is used that extends along the entire window.
The design of the children's room in bright colors gives a wide field for children's fantasies.
Find the right angle for the ceiling rails inside and outside the corners. Miter cut off to 45 degrees and hold them in place along the chalk lines. If there is a gap, adjust the angle of the saw and cut again until they become tight. Photo 4: Install the ceiling railsGlue the ceiling rails in place with construction glue. Nail rails to beams where possible. Where you cannot hit the ceiling beams, nail nails into drywall at an angle of 45 degrees. Corner nails will hold the rails in place until the stickers are put on. Thanks to the mirror panel throughout the wall, the area of \u200b\u200bthe guest bathroom visually almost doubled. Comment on FB Comment on VK Also in this section Geometrium workshop developed a modern interior for a two-room apartment for an active family. Redevelopment allowed to place a bedroom, a nursery and a public area on this area. Photo 5: Install the wall railsAttach the rails to the studs using 2-in. bard. Cut ends for inside corners. Then align the outer corners using the same angle determination technique shown in the photo. A long molding piece is awkwardly processed and difficult to measure and precisely cut. At first, its installation facilitates the work, because the first part has square cuts at both ends - it does not cope. Work right. Using the first part in place, add the part to the right and go around the room in that direction. Thus, you will make the most of your 45-degree cuts with the saw mounted on the left. With the saw mounted on the left, the engine to the side. This simplifies the molding process, and the cut mark becomes easier to see. Use construction glue on all rails - even where you can nail studs and ceiling beams. This way, you can only use enough nails to hold the trim in place until the stickers stick and you have fewer nail holes to fill. 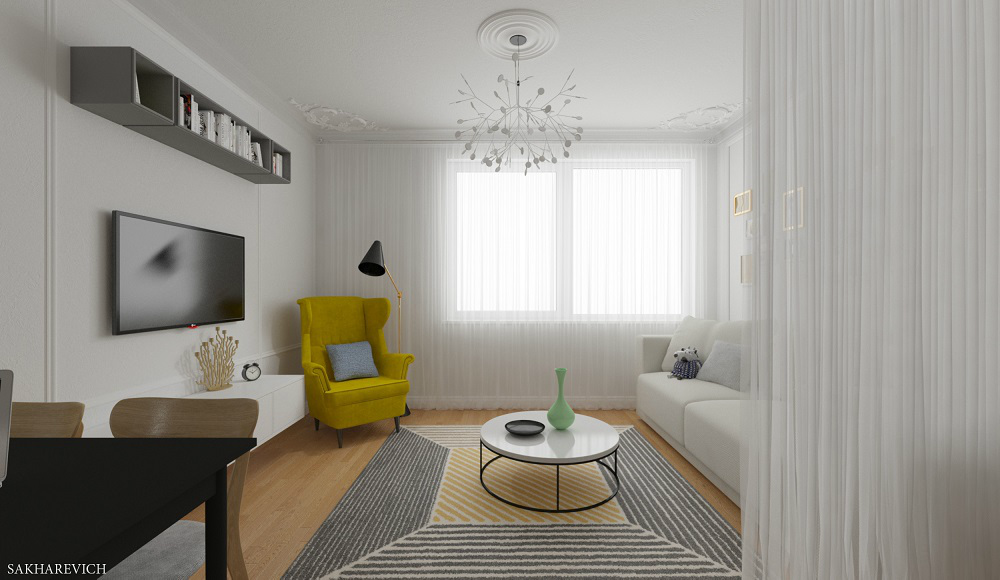 Designer Yana Sakharevich created a minimalistic interior of a two-room apartment for a family with children. She gave all the private space to small family members, evicting her parents in a public zone. 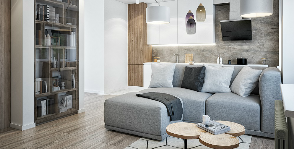 The bright design of the apartment attracts with a combination of natural textures and bright accents, the harmony of simple forms with more complex ones. Warm comfort reigns here due to the abundance of natural materials.  The original design project of this apartment was created taking into account the high requirements of its owner. The client wished to see a comfortable and functional interior with a subtle sense of taste. 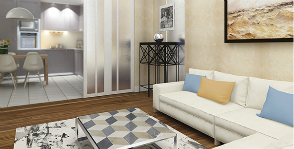 In order to make your home spacious, cozy and comfortable, it is very important to correctly organize the interior. What design techniques will help expand your living space? 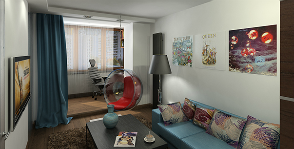 What is more important for a comfortable existence - a lot of tiny little rooms or a spacious space? Youth chooses the latter - a minimum of partitions and a maximum of freedom. 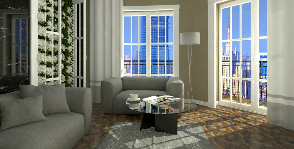 Plants in the interior of a residential building with a non-standard layout. In particular, we are talking about the living room and bedroom with floral walls and plants, unpretentious care 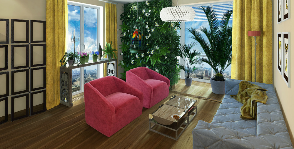 The flower design in the apartment turned the living room in a multi-storey building into a colorful southern gazebo. A flowering wall, a cage with parrots, a clear, clear sky - it seems that somewhere in the distance, the sea gently splashes 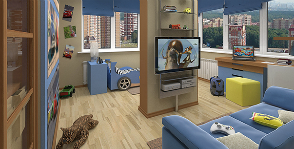 Is it always appropriate to give the most spacious room to the living room? Why not arrange a place for the full life of the smallest member of the family?  Is it possible to build several multi-functional zones in the living room, maintain minimalism and at the same time maintain coziness and ease of movement? The positive answer is in the project of designers from Yekaterinburg. 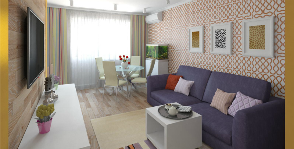 These people do not change with age, but apartments - easily, and any. Designer Julia Gavrilova shows what can be done from a two-room Khrushchev with the help of color and a small redevelopment. 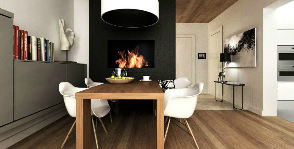 The 1-room apartment has a dining room, dressing room, a bedroom with a loggia, a kitchen and a bathroom. It seems that by redevelopment it is impossible to achieve such a result, however, the author of the project succeeded.  Cheerful colors can make even the laconic interior “play”. The main thing is to choose the right colors and organically fit them into the surrounding space. 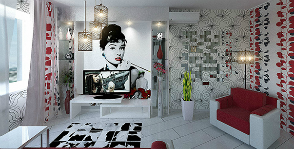 Non-standard layout apartments are a tidbit for any designer. Broken spaces and ridiculous load-bearing partitions kindle their professional appetite.  An open layout and bright colors can easily transform and modernize an old standard housing. The main thing is to competently zonize the space and finish it with modern materials. 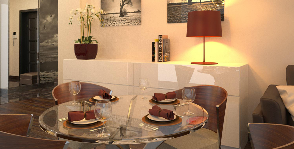 Studio layout involves the free layout and isolation of only a berth and sanitary facilities. How to competently connect in one room several differently functional zones? 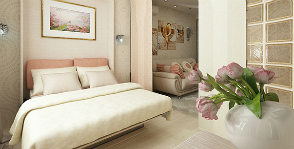 Designer Polina Lebedeva knows how to fit a sleeping place into a public area in an original way. This technique is ridiculously simple and at the same time original. |


| Read: |
|---|
Popular:
Tarot of the Sacred Feminine
|
New
- Consider a Japanese horoscope by date of birth
- Tarot cards - a mirror of human fate: examples of fortune-telling
- Interpretation of sleep stove in dream books
- Dream of applause, why applause in a dream
- A psychological portrait of the tarot layouts from alicia hshanovskaya
- Why in a dream does the Warehouse dream?
- Why do I dream of a bun with poppy seeds, is this a good sign?
- Characteristics of a female lion
- Boar: what a dream
- Dream grouse, what a partridge dreams about in a dream


